
The complete guide
How To Choose And Use A Bike Tow Dog Leash
The problem with holding a lead while riding
Most people try it once. You take the dog out, grab the lead in your left hand, and set off. For about two minutes it feels fine. Then a cat appears, or a gate slams, or your dog decides the gutter smells interesting, and the whole bike pivots around your wrist.
The physics are not on your side. A bike is balanced on two narrow contact points. Your arms are what steer it. The moment one arm is tethered to a 30 kg animal with its own agenda, you have handed over partial control of the steering to something that cannot see the road ahead the way you can.
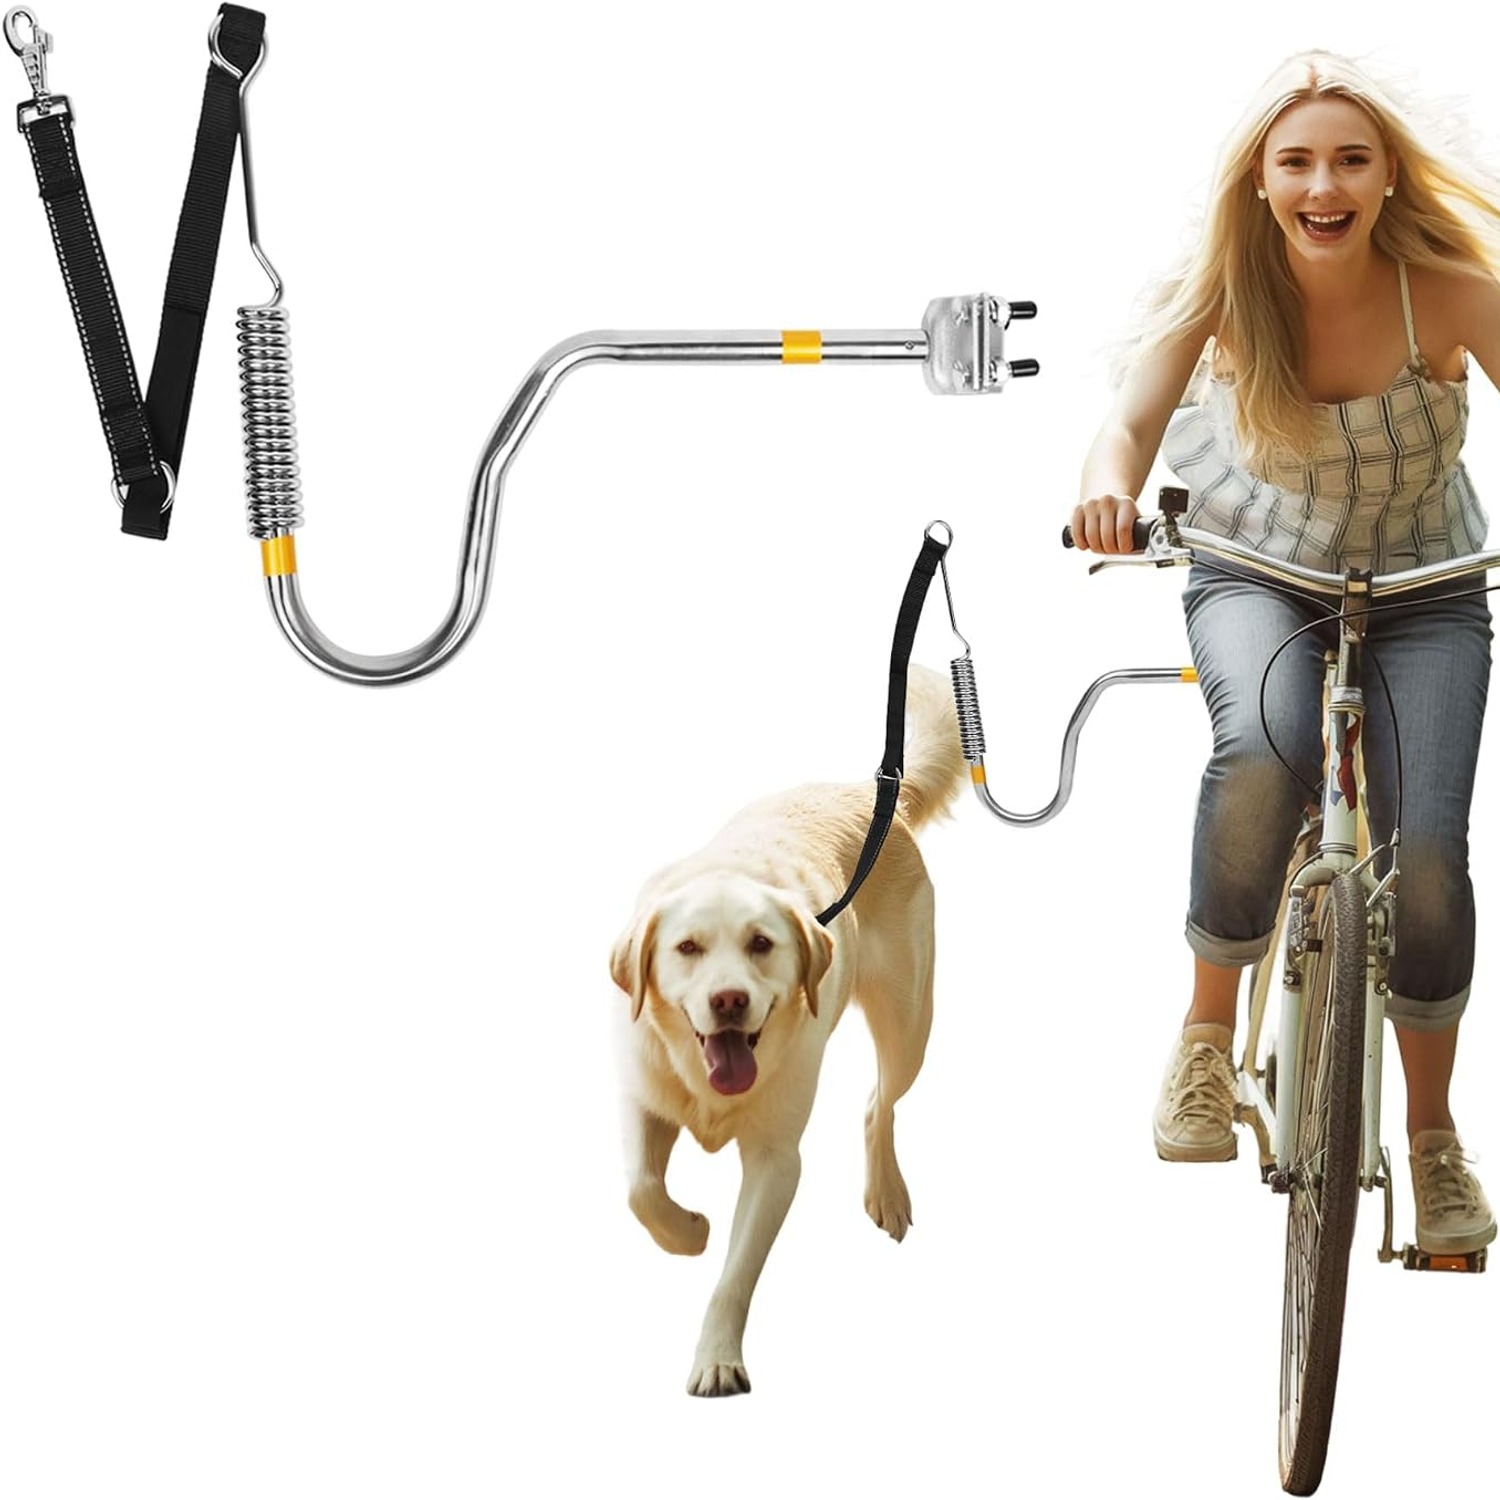
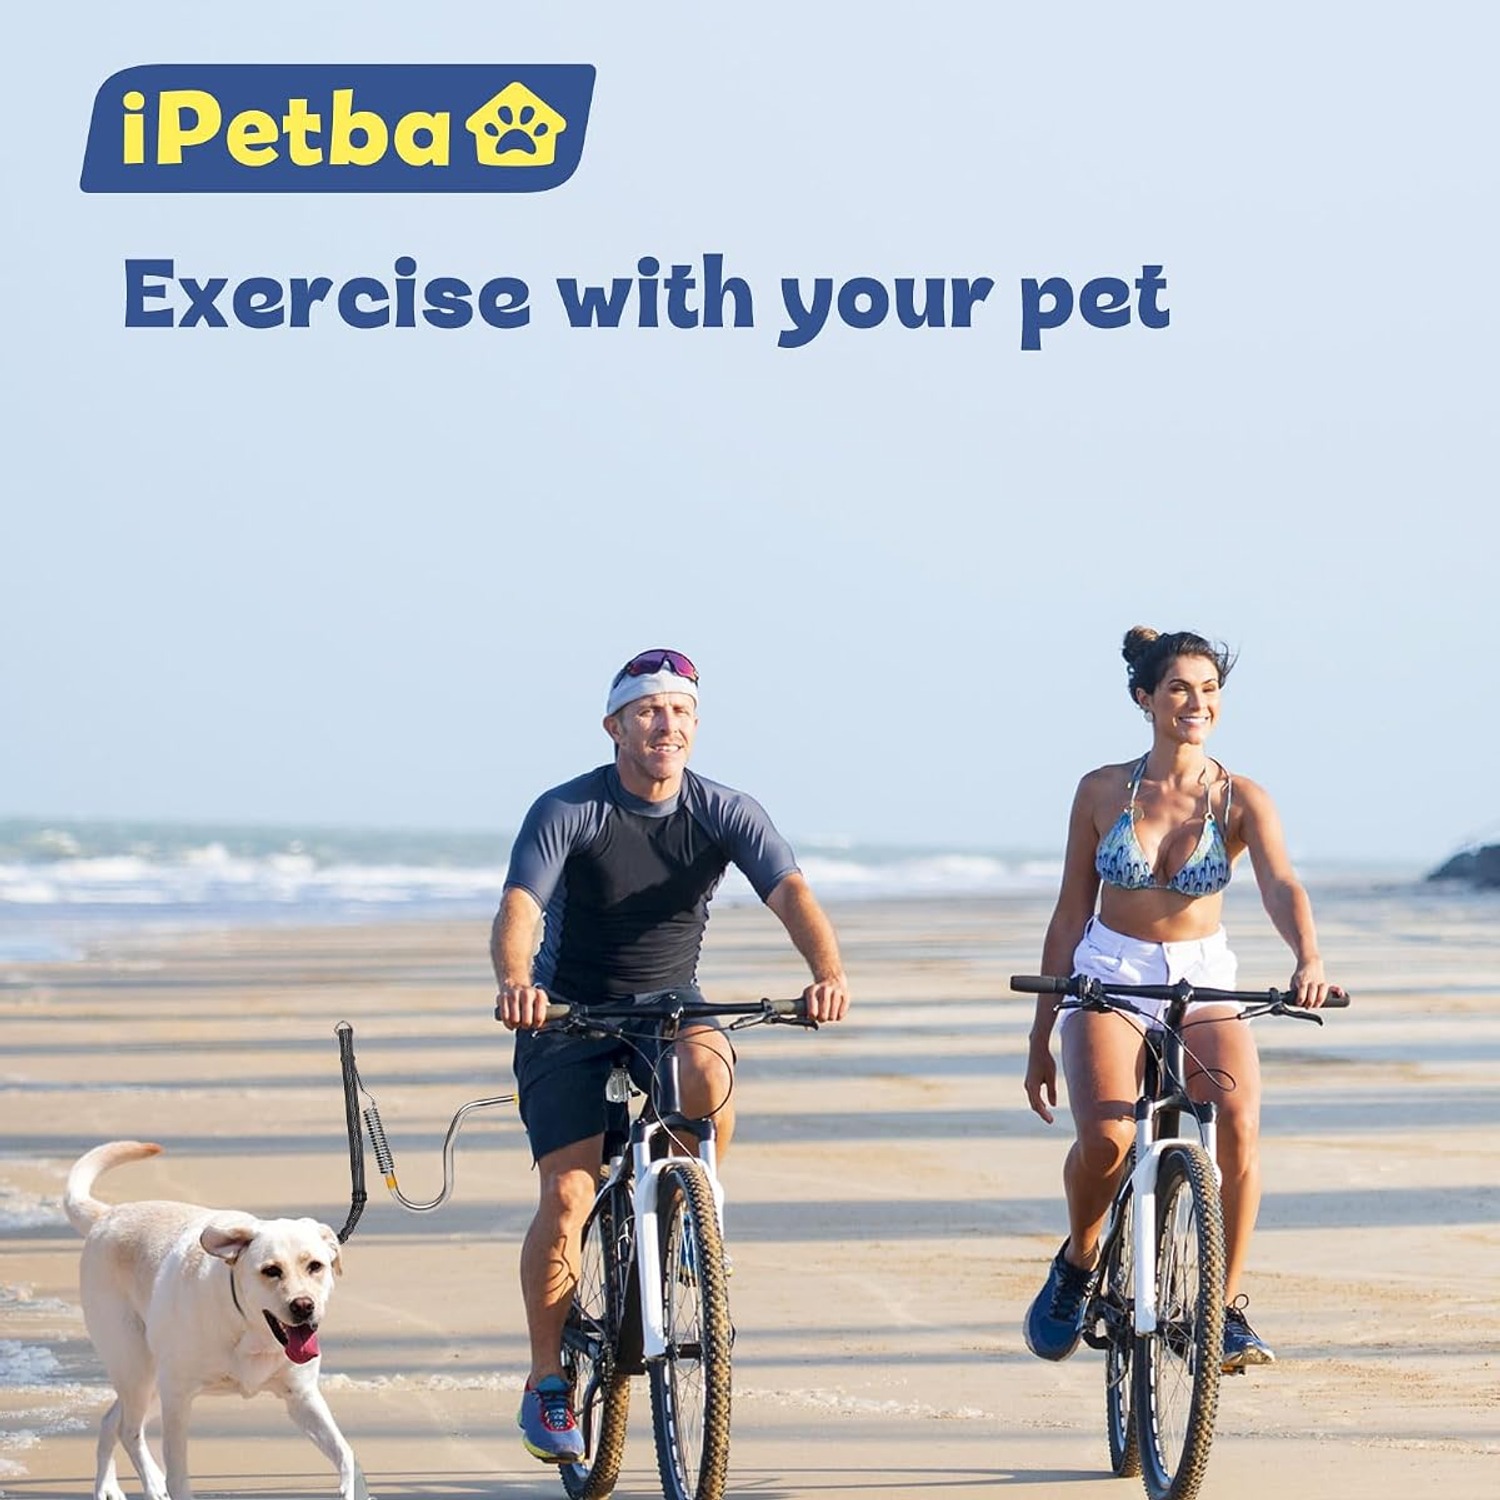
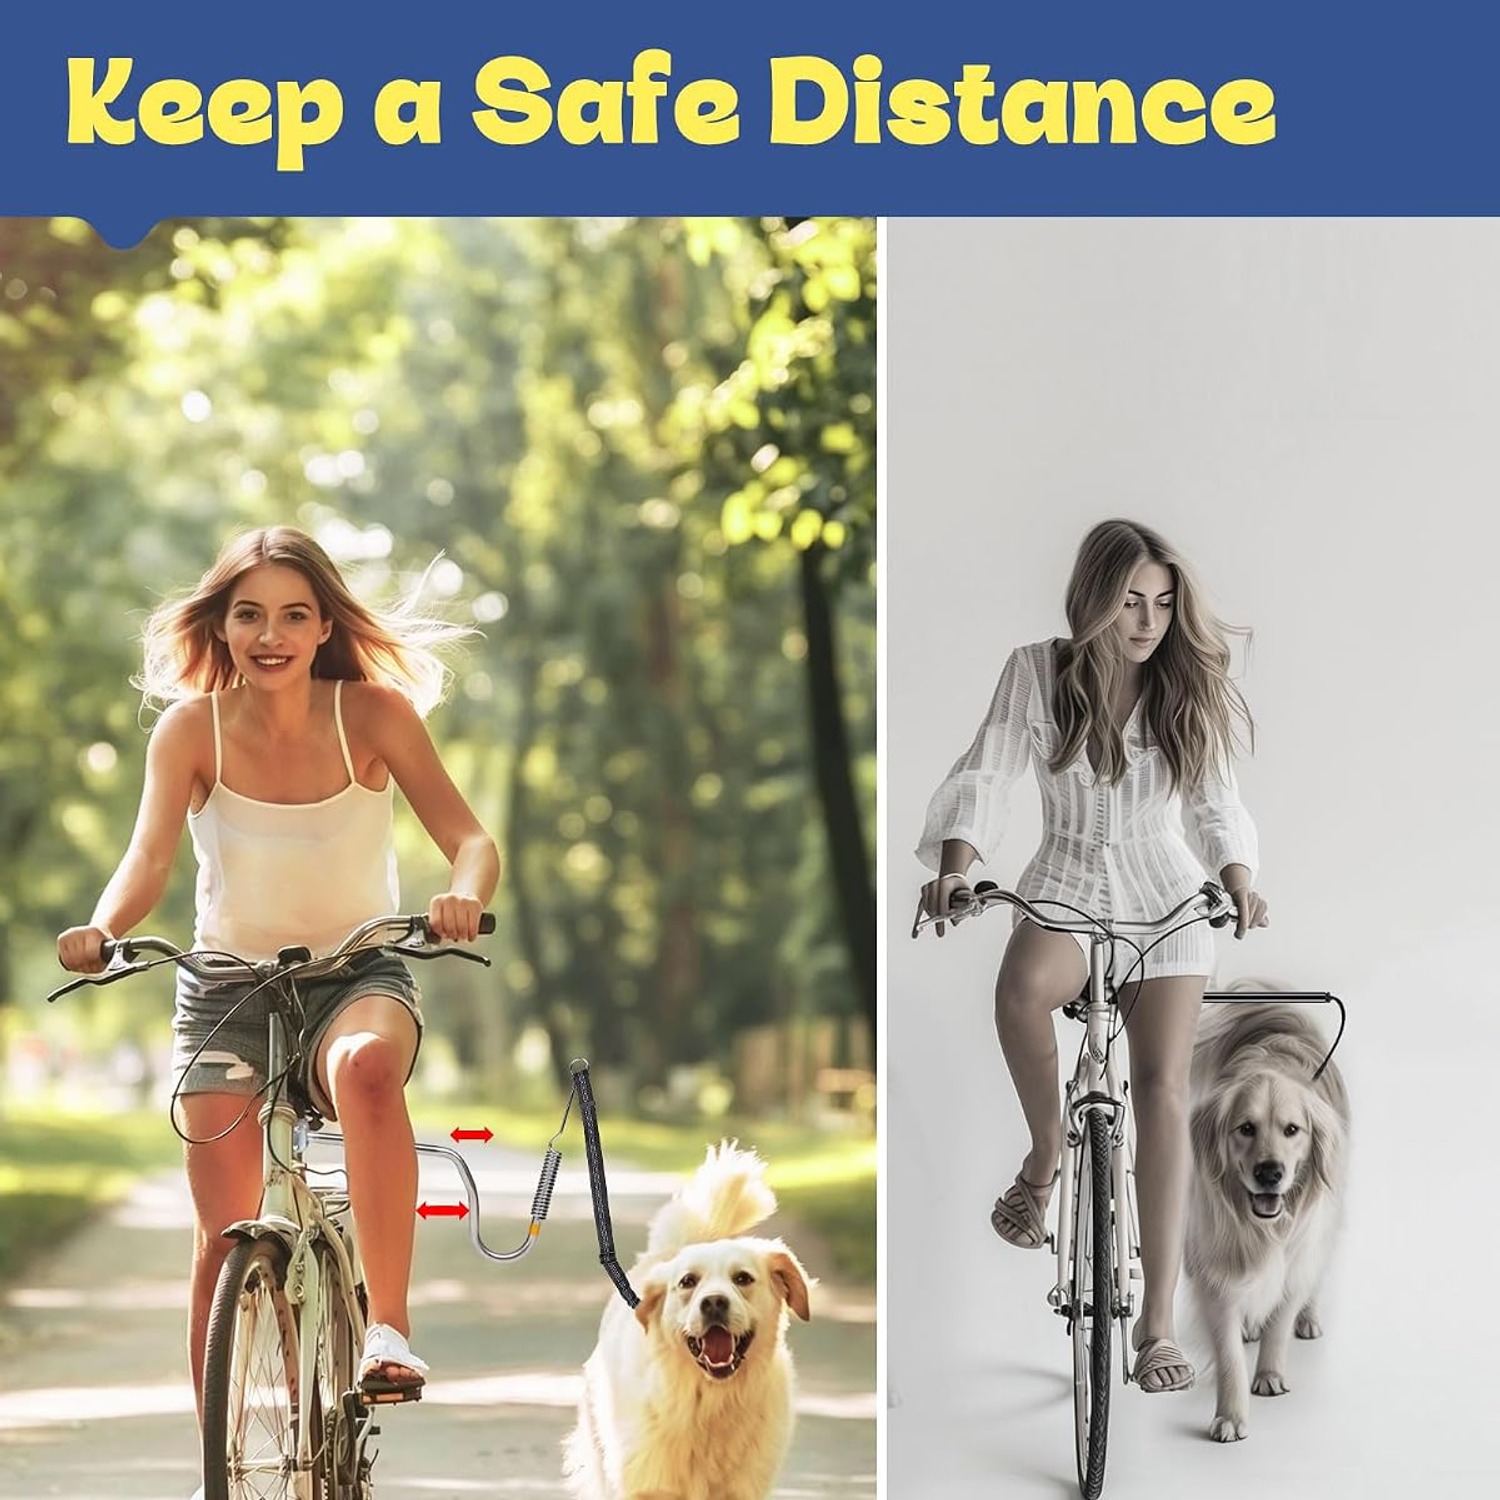
A bike tow dog leash fixes that by changing where the force lands. The lead no longer connects to you. It connects to the frame, low and central, where the bike is heaviest and most stable. Your hands go back on the bars. Your dog still runs beside you, just through a connection that does not yank the front wheel.
How the attachment works
The design here has three parts working together.
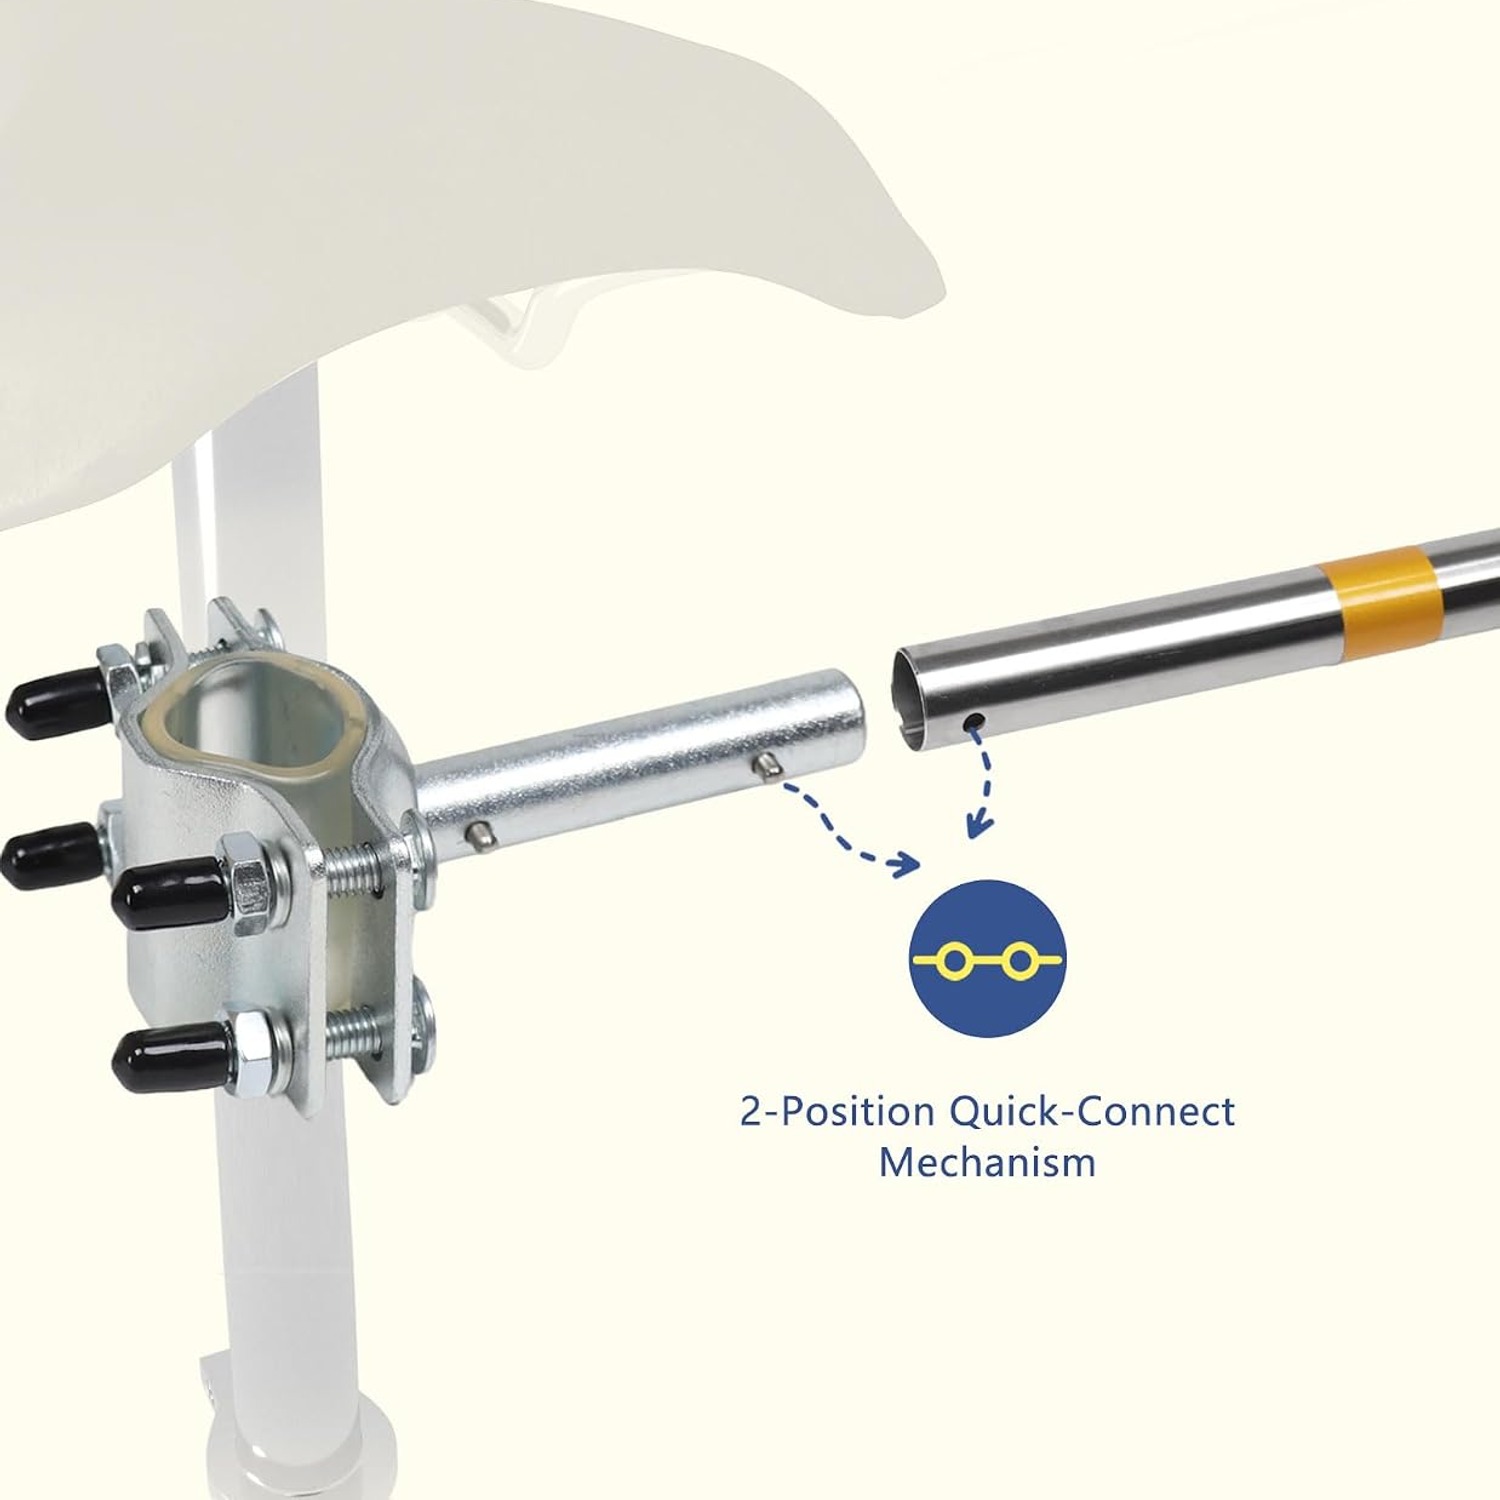
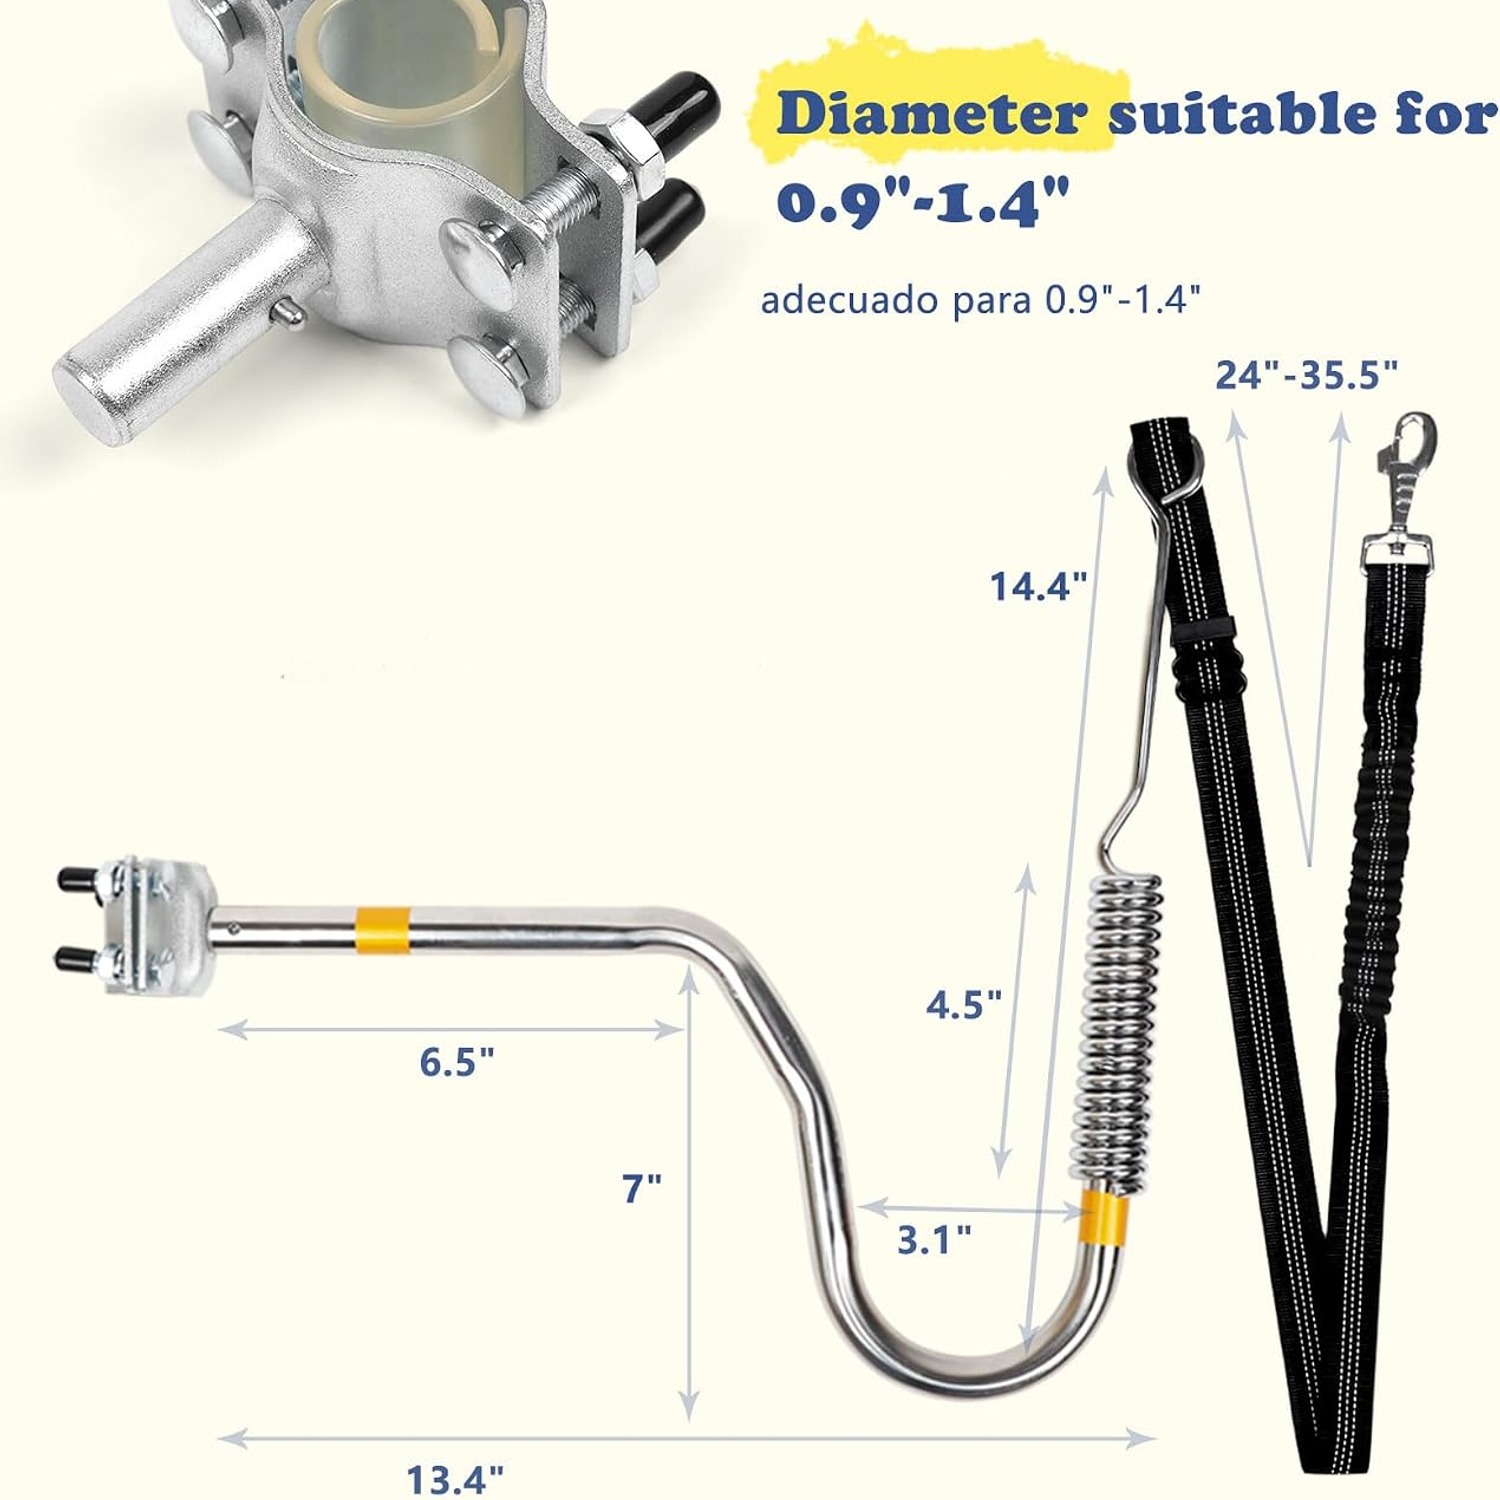
First, the mount. It clamps under the bike seat, which is a strong point on almost any frame and sits close to the bike's centre of mass. That placement means a sideways pull tries to shift the whole bike slightly rather than twist the bars.
Second, the arm. This is the stainless steel body, and it is held high rather than running low toward the axle. The height is deliberate. A lead that hangs low is a lead that can swing into pedals, chain or rear spokes when your dog drifts in. Keeping the attachment point above that zone means the nylon line stays out of the moving parts even when your dog cuts close to the frame.
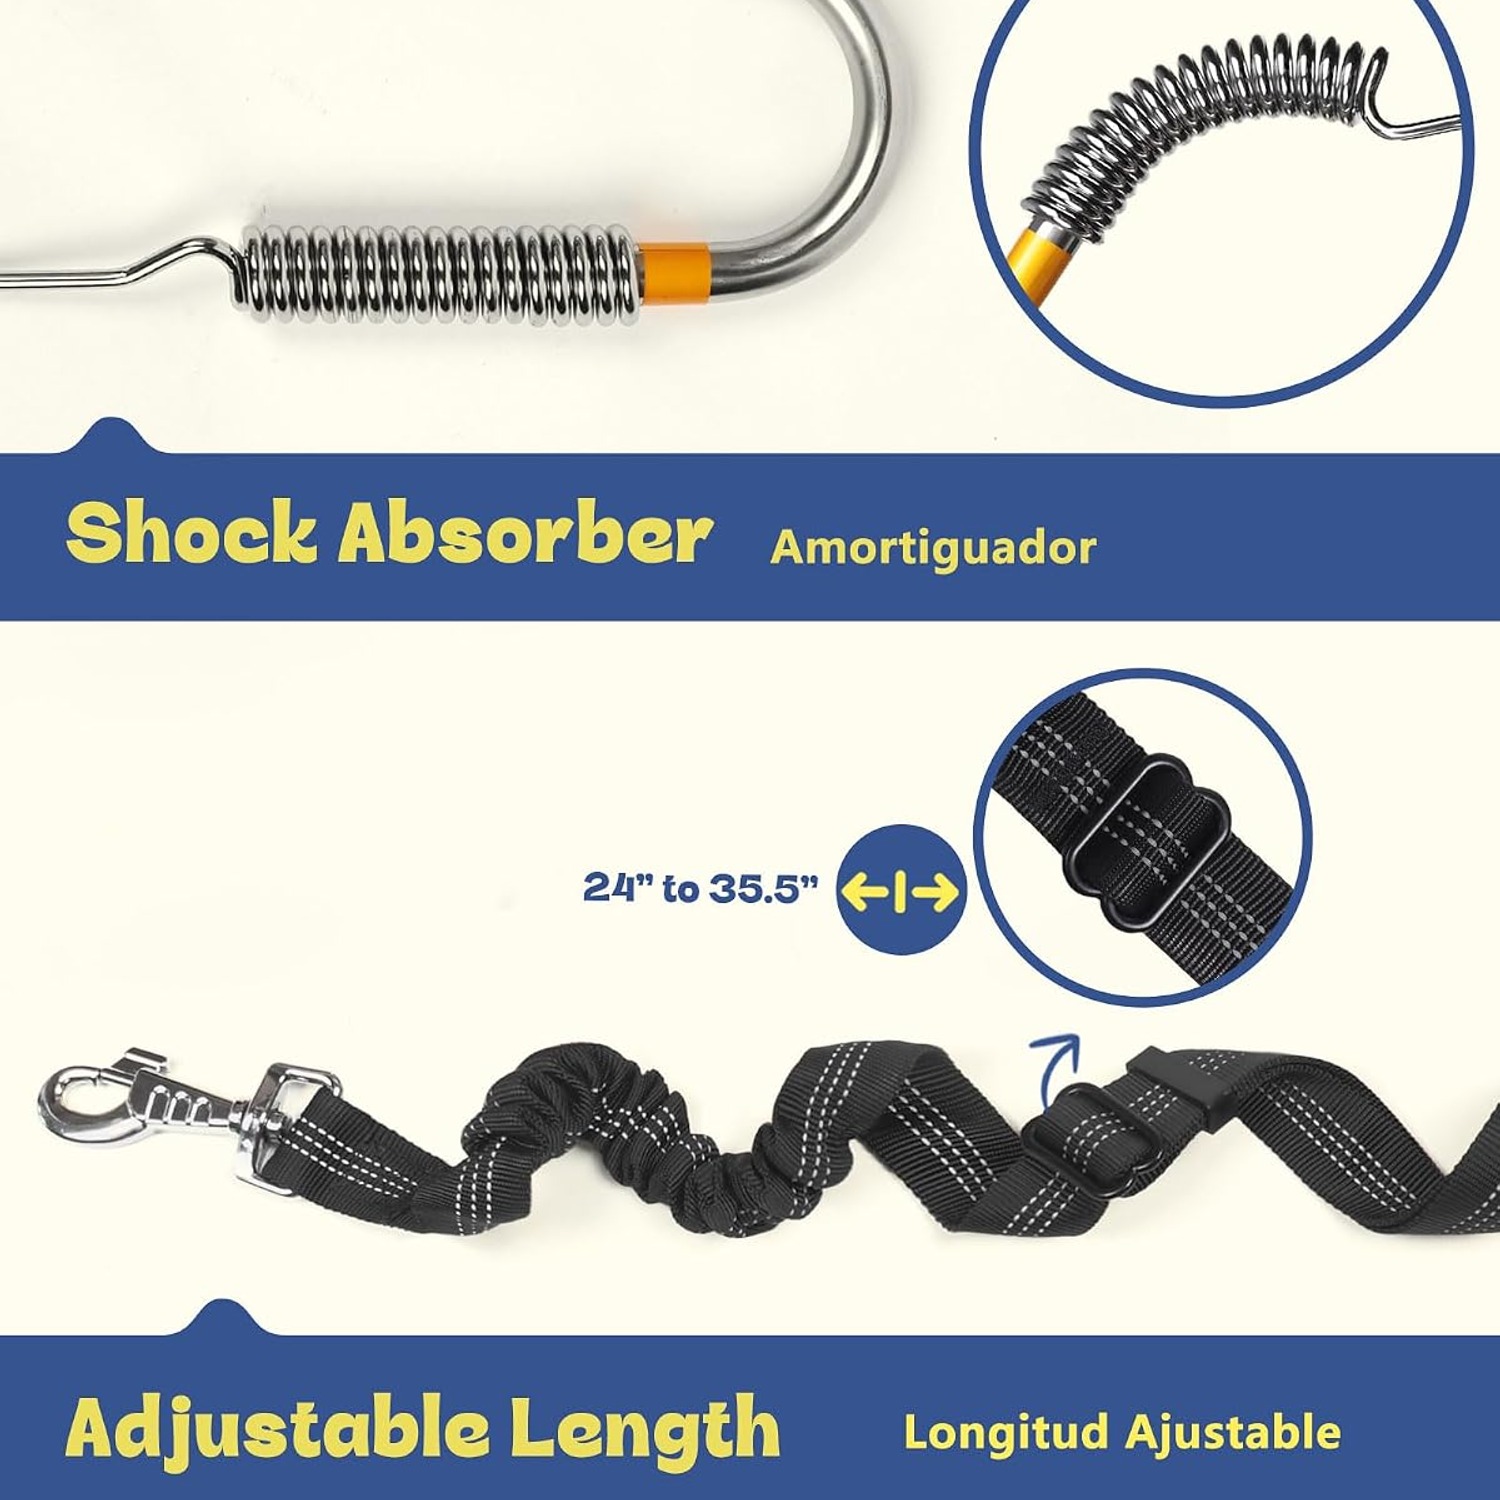
Third, the spring. A rigid arm alone would transmit every lunge straight into the saddle as a sharp shock. The shock-absorbing section stretches instead, spreading that force over a longer moment. You feel a gentle lean rather than a jolt, and your dog's harness applies a softer stop. For anyone shopping for the best shock absorbing dog bike leash, this is the feature that separates a comfortable ride from a jarring one.
From the spring, the adjustable nylon lead runs to your dog's harness. Nylon rated to a high pull strength keeps weight down while giving you a line that will not snap under a hard pull.
Who this suits
This attachment is listed for dogs up to 50 kg and classed for large breed sizes. That makes it a good match for a shepherd, a retriever, a husky, a boxer or a staffy, the kinds of dogs who genuinely need more exercise than a walk around the block provides.
It also suits a particular kind of rider. If your cycling with a dog looks like a steady roll along a cycle path or a quiet back street, this works well. If your riding involves fast descents, tight singletrack or heavy traffic, that is not the time to bring the dog along, with or without an attachment.
Think about your dog's temperament too. A dog that already walks reasonably well on a lead will adapt quickly. A dog that pulls constantly and reacts to everything needs more groundwork first. The attachment manages pull, it does not remove the need for training.
Choosing the right setup
A few things matter when you are comparing options for a dog bike leash attachment.
Check the mounting point. Under-saddle mounts like this one are common because they are strong and central. Make sure your saddle rails are clear and that you are not already running a saddlebag, a rear light bracket or a seatpost rack in the same space.
Check the side. Being able to mount on either the left or the right is genuinely useful. You want your dog on the side away from traffic, and that side flips depending on which country you ride in.
Check the weight rating against your dog, not against your optimism. The 50 kg figure is a ceiling, not a target. A dog near the top of that range generates real force when it decides to move.
Check what you are clipping to. This is the point people skip. Never run a bike lead to a collar. Use a chest harness with padded straps, fitted so you can slide two fingers under it. Any pull then spreads across the shoulders and ribcage instead of loading the throat.
Fitting and first rides
Assembly runs in a set order. Fix the mechanism under the seat, attach the spring to the rod, connect the lead to the spring, then connect the lead to your dog. The manual in the box walks through it. Do the whole thing before your first ride, not in the driveway with an excited dog circling you.
Then take it slow. Walk the bike beside your dog with the lead attached and do not get on. Let the dog work out that the bike is now part of the walk. Do that for a few minutes, a couple of times.
Next, ride slowly in an open, quiet space. A park path early in the morning is ideal. Keep the lead on the shorter setting so your dog stays close and predictable. Take corners wide, because the bike is now effectively wider than you are used to.
Build up over a week or two. Five minutes, then ten, then twenty. Watch your dog's gait the whole time. A relaxed trot with a loose line is what you want. Panting hard, falling behind or pulling to stop all mean you are done for the day.
Pace matters more than distance. Dogs run at a trot comfortably but struggle to sustain a bike's cruising speed for long. If you are on an e-bike, the temptation to go faster is real and it is worth resisting.
Surfaces, weather and timing
Road and footpath surfaces get hot fast in summer, and dogs have no footwear. Press the back of your hand flat on the ground for seven seconds. If you cannot hold it there, your dog should not be running on it. Early mornings and evenings are the safe windows in warm weather.
Carry water. A collapsible bowl and a bottle weigh almost nothing and turn a risky ride into a manageable one. Stop every ten to fifteen minutes on warmer days and let your dog drink.
Gravel and grass are kinder on paws than hot bitumen. Mixed surfaces also keep things interesting for the dog, which helps with focus.
Looking after the hardware
Maintenance is simple but should actually happen.
After wet or muddy rides, wipe the steel arm and spring down with a damp cloth and dry them off. Stainless steel handles moisture well, but standing water in a joint eventually causes problems anywhere.
Hand wash the nylon lead in warm soapy water when it gets grubby and let it air dry fully. Skip solvents and bleach, which weaken synthetic fibres.
Before each ride, give the setup ten seconds of attention. Grab the arm and give it a firm wiggle to check the mount is tight. Look at the nylon for fraying, especially near the clip. Check that the spring moves freely and shows no cracking. Replace the lead if the fibres are visibly worn.
Store the bike under cover where you can. The attachment can stay fitted between rides, though taking the lead off when you lock up in public is sensible.
The short version
A bike tow dog leash solves one specific problem well. It takes the lead out of your hand and puts it on the bike, where a sudden pull leans the frame instead of twisting the bars.
This one uses a stainless steel arm mounted high to keep the lead clear of pedals and spokes, a spring to soften lunges, and an adjustable nylon lead rated for dogs up to 50 kg. It mounts under the saddle on either side and fits regular, touring and mountain bikes.
Pair it with a proper chest harness, train in short sessions on quiet ground, keep the pace at your dog's trot, and check the ground temperature in summer. Do those four things and riding with your dog becomes the easy part of the day rather than the nervous part.